Tuesday, March 31, 2015
NEW LD 30% off coupon!
Heads up! There is a new LD coupon available! Use the code LastChanceDollarDays to take 30% off any purchase of $10 or more! Shop the LD Dollar Days Sale and use the coupon to save even more! Click HERE to shop the LD Dollar Days Sale before it ends this Friday.
Monday, March 30, 2015
Jin's Carrot Box
After I posted my Rolly Pollie Gift Tags the other day, many of you wanted to know where I got the carrot box and if that was an LD file.
My "Frankenstein" carrot box as seen from my Rolly Pollie Gift Tags post. |
When I did that project, I looked for a carrot box on the LD site but was unable to find one. So I made my own by combining their Valentine Cone Box with the carrots from the Rolly Pollies Cut It (SVG) set.
Even though I made it fairly quickly, I realized that many of you would find it troublesome to have to make your own. So I asked LD if they had one on their site that I had missed.
It turned out that I was right. They didn't have a carrot box BUT they offered to make one and they did.
The carrot box is now available in the LD store.
Sunday, March 29, 2015
The Costco 93" Bear is available again!
Not long after I posted about our very big bear, Costco sold out of it. Since then, I've had a lot of folks ask where they can get one. I go to the Costco store about once a week and I have not seen the bears in stock since last October. However, I just checked their website and see that it's available online again!
The price of almost $280 is a bit higher than what I paid last year but it includes shipping and handling. Considering how big the bear is, the online price really isn't that bad. Besides, it saves you the trouble of having to bring it home from the store yourself. Trust me, it wasn't easy for the 5 of us to lug our bear home. It's seriously huge.
You can buy the bear from the Costco website by clicking HERE. I'm not sure if you need to have a Costco membership in order to shop on their site. Can you let me know if you know?
To see my original post about our bear, click HERE.
Friday, March 27, 2015
Friday Freebies {plus new Snips and Snails}
I'm loving the new collection that LD has just added to their store today. Check out their Snips and Snails, it's seriously adorable!
This is the last week to shop the LD Dollar Sale. Get your 75% off Cut Its (SVG), graphics, fonts, and papers before the sale ends. You can even use a coupon on top of the sale prices. Use the code HelloDollarDays to take an additional 25% discount if you have at least $10 worth of products in your cart.
Click HERE to shop the sale.
Here is your Friday Freebie:
Click HERE or the image above to go to the LD site. Add the Snips Snails Mail Cut It (SVG) and Graphic to your cart and checkout. You pay $0.00! The links to the downloads will show up after the "transaction" is completed.
Silhouette Studio users, don't forget to grab your weekly freebie from the Silhouette Design Store.
Rolly Pollies Gift Tags
I had mentioned on my Facebook page recently that the Rolly Pollies Peep Game file can be used for more than a "Don't Eat Pete" game board. The cute graphics can be extracted (by using the "Crop" trick) and used for print-and-cut projects. For example, they can be used for making some super adorable gift tags.
This is how I did it:
Please click on the image to enlarge. |
Before extracting the images, I removed the "DON'T EAT PEEP" header by using Trace and Detach. Next, I drew a rectangle around each of the images. With both the rectangles and the graphic selected, I applied the Object>Modify>Crop command, leaving only the cute images behind and without the grid.
I can now use the extracted images to make the gift tags.
Please click on the image to enlarge. |
First, I overlaid each image over a tag, and resize both to the same width. To get a seamless look, I filled the tag with the same background color as the extracted image. I also added a "To/From" space as well as a greeting. Once all the tags are prepared, I used my Silhouette Cameo to print-and-cut them out! Easy peasy!
Here are my finished gift tags:
---
Files used:
Rolly Pollie Peep Game
Layered Tags
Tuesday, March 24, 2015
Jin's Hello Kitty Instax camera
You may remember that not too long ago, I posted about my Instax cameras (If you had missed it, click HERE to see the post). Even though I mostly use my Instax SP-1 printer these days, I do carry an Instax camera around, especially when we travel. Recently I added one more to my collection...it's a Hello Kitty Instax camera!
It's so insanely cute!!!
It's a tad bigger than my other INSTAX cameras but it is so fun to
In fact, the Hello Kitty INSTAX camera is even bigger than my Lomo'Instant!
Well, maybe by just a little bit.
The Hello Kitty Instax camera also comes with a hand strap, a box of film, and a sheet of Hello Kitty stickers. Everything looks so cute that even my kids were oohing and aahing as I was removing everything out of the box.
Of course, they also mentioned that they want the whole thing. Ha ha! That's funny. As if I'm going to let them have it.
Sorry girls, but that's not happening. This
Friday, March 20, 2015
Friday Freebies {plus new Rolly Pollies}
TGIF! Check out what's new in the LD store. It's the ....Rolly Pollies!
The LD Dollar Days Sale is happening right now and almost everything in the store is 75% off! You can even use a coupon to sweeten the deal. The code HelloDollarDays will take an additional 25% off if you have at least $10 worth of products in your cart.
Here is your Friday Freebie:
Click HERE or the image above to go to the LD site. Add the Rolly Pollies Peep Game (printable) to your cart and checkout. You pay $0.00! The link to the download will show up after the "transaction" is completed.
Silhouette Studio users, don't forget your weekly freebie from the Silhouette Design Store.
Happy Spring!
Happy First Day of Spring!
I want to say that I'm so glad that our cold winter is over but to be honest, the season wasn't really that chilly for us here in the Pacific Northwest. In fact, Seattle broke the record for the warmest February! Due to the unseasonably warm weather, the cherry blossoms here have even started to bloom early.
Cherry blossoms in the Quad at UW. |
Still, I'm super excited that Spring is officially here. See? I even made a card to celebrate the season.
I chanced upon the Lil Peanuts Cut Its (SVG) set while browsing the LD Dollar Days Sale and I just had to cut out the lambie. It's so cute!
If I stare at it long enough, will it go "Baa...."? |
After cutting and putting the lambie together, I decided to "cute-tify" it further. The illustration below shows how I made an additional layer for the top of the lambie's head.
Click on the image to enlarge |
I used the Grass Cupcake Wrapper Cut It/SVG to add a layer of "grass" on the card front because I like how it has a curved look. To soften the color of the green "grass" cardstock, I cut out a second "grass" layer out of vellum and adhered that over the green cardstock.
I cut the sentiment out of black vinyl because it looked sharper than if I had printed it. The butterflies were cut out of yellow vellum and attached to the card front with glue dots.
Here is the finished card. You likey? Yeah, me likey too. :-)
Have a great Spring, y'all!
---
Files used:
lamb: Lil Peanuts Cut It (SVG)
grass: Grass Cupcake Holder Cut It (SVG)
butterfly: Humpty Dumpty Had a Great Spring Cut It (SVG)
"happy": LD Modern Sans font
"Spring": {free download HERE}
Thursday, March 19, 2015
{Guest Post} Holly's Thursday Tutorial: How to make a postcard with Silhouette Studio
I always enjoy looking at what others have created with their LD files. When Holly Wood shared her postcards on my Facebook page, I loved the idea so much I asked if she would share a tutorial on the blog. I was super excited when she agreed!
In today's tutorial, Holly will show you how you can make some of these postcards using Silhouette Studio. Follow the easy how-to below and try making some of these post cards for yourself.
~ Jin
My name is Holly and I came to paper crafts via scrapbooking when I felt my life was zooming by. I couldn't find the elements I wanted and eventually got frustrated enough that I purchased a Silhouette Cameo (I did the proverbial "gulp" when I placed my order).
When looking for files, I found Under A Cherry Tree and that was when I started to really began to experiment. Last year before vacation, I wanted to include some family that was unable to go with us, and I wanted it to be personal, so I learned to make my photos into postcards. I think next time, I would not print my own photos at home, but would get them printed commercially as the top coat or finish might hold up better to the rollers in the US Postal Service. Maybe if I only had a few to send out, I might ask to have them hand stamped.
Enjoy!
Holly
---
How to make a postcard with Silhouette Studio
1. Open a new file and draw a box that is about the same size as the photo. Most standard photos are 4x6 so that is what I used.
2. Next, draw a line that is about ½' shorter that your height (so mine was 3.5”) and make sure the line style is .50 or .75 and fill with color. Select all and group.
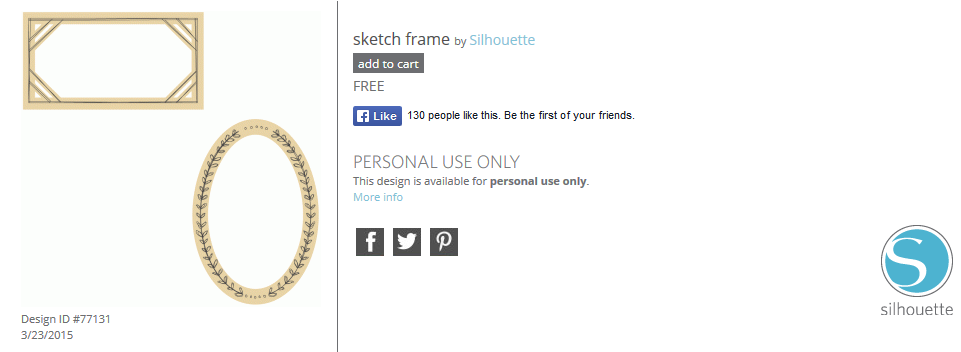
3. Next you need to choose a topper, in my case it was the letter “L” from Lettering Delights' “Chill Out” doodlebat font. You can find interesting dingbats at places like Dafont and 1001 font. I used the doodlebats from Lettering Delights because I can release the compound path and use just a portion of the design.
4. I released the compound path, then released it a second time and pulled the swirl out of the doodlebat.
5. Rotate the swirl 180 degrees and mirror to the right. Group the images.
6. Fill with color and change the outline if you want.
7. Move the doodlebat to the top of the line. Don't group at this point.
8. Make a 1x1 square (this will represent the approx size of a postage stamp), place where a stamp would go, then resize the topper if necessary. You can keep the square or delete it and group the rest of the project.
9. Choose a font and write Post Card, arrange above the fancy work, draw lines for the address on the right and if you choose, add a graphic on the left, then lower the transparency to desired level.
Here are some additional postcard ideas from Holly:
Thank you, Holly for the great tutorial! If you enjoyed today's tutorial, please let Holly know by leaving a comment below or on my Facebook page. If you have a project that was inspired by a tutorial on this blog, you are welcome to share it on my Facebook page.
In today's tutorial, Holly will show you how you can make some of these postcards using Silhouette Studio. Follow the easy how-to below and try making some of these post cards for yourself.
~ Jin
My name is Holly and I came to paper crafts via scrapbooking when I felt my life was zooming by. I couldn't find the elements I wanted and eventually got frustrated enough that I purchased a Silhouette Cameo (I did the proverbial "gulp" when I placed my order).
When looking for files, I found Under A Cherry Tree and that was when I started to really began to experiment. Last year before vacation, I wanted to include some family that was unable to go with us, and I wanted it to be personal, so I learned to make my photos into postcards. I think next time, I would not print my own photos at home, but would get them printed commercially as the top coat or finish might hold up better to the rollers in the US Postal Service. Maybe if I only had a few to send out, I might ask to have them hand stamped.
Enjoy!
Holly
---
How to make a postcard with Silhouette Studio
1. Open a new file and draw a box that is about the same size as the photo. Most standard photos are 4x6 so that is what I used.
2. Next, draw a line that is about ½' shorter that your height (so mine was 3.5”) and make sure the line style is .50 or .75 and fill with color. Select all and group.
4. I released the compound path, then released it a second time and pulled the swirl out of the doodlebat.
5. Rotate the swirl 180 degrees and mirror to the right. Group the images.
6. Fill with color and change the outline if you want.
7. Move the doodlebat to the top of the line. Don't group at this point.
8. Make a 1x1 square (this will represent the approx size of a postage stamp), place where a stamp would go, then resize the topper if necessary. You can keep the square or delete it and group the rest of the project.
9. Choose a font and write Post Card, arrange above the fancy work, draw lines for the address on the right and if you choose, add a graphic on the left, then lower the transparency to desired level.
Here are some additional postcard ideas from Holly:
This one used Banner Day Fun from LD. |
Florality topper from dingbat at Dafont, re-colored |
Campfire graphic from Fayette Designs/Pickleberry Pop |
Thank you, Holly for the great tutorial! If you enjoyed today's tutorial, please let Holly know by leaving a comment below or on my Facebook page. If you have a project that was inspired by a tutorial on this blog, you are welcome to share it on my Facebook page.
Subscribe to:
Posts
(
Atom
)